It may be winter time, but that doesn’t mean you have to send your green thumb into hibernation. While everything may be covered in frost or snow outdoors, there are still several herbs which you can easily grow indoors.
Of course, not all herbs are created equal. Some herbs are definitely better suited for indoor gardening. The five herbs that typically grow the best indoors (and are used most commonly in cooking) are: chocolate mint, oregano, thyme, chives, and rosemary.
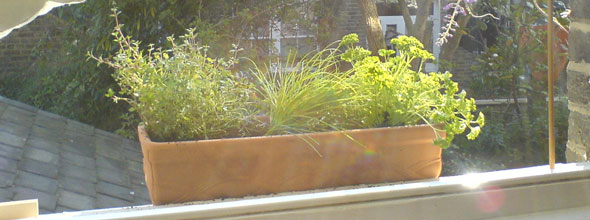
Indoor gardening is often referred to as “windowsill gardening.” In order for your indoor garden to thrive, you will want to place your pots/containers on the sunniest windowsill in your home.
Herbs need about 4 hours of direct sunlight per day in order to thrive in your indoor garden. Even if your indoor herbs are getting 4 hours of direct sunlight per day, you may want to supplement them with a grow light. The sun’s rays are much less intense in the winter months than in the summer months.
You must supply your herb plants with adequate lighting, or they will be unable to produce enough food to maintain themselves; thus, their leaves will turn brown, and your herb plant will subsequently become sickly, and die.
Four-inch pots are great for windowsill gardening. They are usually just the right size to fit on most windowsills, and will provide your herbs with ample room to grow. It is important that your chosen pot has drainage holes, otherwise your herbs may rot.
Terra cotta pots work well, but tend to dry out pretty quickly in the heat of the indoors, so you may want to consider using a plastic liner. A saucer under your pot is ideal, to keep water from leaking out and damaging your windowsill.
Once you have selected pots, you will want to prepare them. To keep your soil from spilling out of the drainage holes, cut squares of window mesh (or similar material) and place them in the bottom of your empty pots. Fill about 1/3 of your pot with potting soil.
Place your nursery pot into your terra cotta pot, and continue filling the terra cotta pot with soil until your nursery pot is completely surrounded with potting soil. Pack the soil tightly, until your terra cotta pot is completely filled. Carefully remove your nursery pot from the soil, leaving the hole in the center of your potting soil.
Carefully remove your herb plant from the nursery pot, and transplant it into the “hole” in center of the potting soil in your terra cotta pot. Press potting soil down gently around your herb plant until it is tightly packed in your terra cotta pot. Add more soil if necessary.
Don’t forget to water your indoor herb garden! With herbs, you want to water less often, but water them more thoroughly. Wait until their potting soil is dry to the touch, and then water them just until water comes out of the bottom of the pot. If your pot doesn’t drain, your drainage holes may be blocked, or you may need to repot your herbs with potting soil that has better drainage.
If you follow these simple steps, these herbs should do very well in your indoor garden; and, if you’re lucky enough, they will survive indoors until you are able to transplant them into your outdoor garden when the weather warms up in the spring.
For more information about herb seeds, visit our website: http://www.heirloom-organics.com/or/organicherbseeds.html